Your first section
A section in SEK is a pair of files plus one line of registration:
- a config (
blocks/<handle>.yaml) that declares the section’s label, its template, and its fields; - a template (
blocks/<handle>.php, or a Blade template in a Sage theme) that renders the saved values as HTML; - a registration: the section’s handle added to a post type’s
sections:list, so the section becomes available in that post type’s editor.
This walkthrough builds one section (a small “promo” band with a headline and
an intro paragraph) from nothing, and confirms it renders on the front end. It
uses the starterkit-classic theme, whose worked hero section is the model
we follow. Every step here has been reproduced live against that theme.
Prerequisites
Section titled “Prerequisites”These are the only prerequisites. There are no hidden ones:
- The SEK plugin is active.
- The
starterkit-classictheme is active and carries its.sek.yml(sections: blocks,postTypes: config/post-types). - The
pagepost type is configured:config/post-types/main.yamllists the sections a page may use. - The site is reachable, with pretty permalinks enabled (WordPress Settings → Permalinks, any non-plain structure). The editor and its REST calls require this.
- Demo content is seeded. The starter showcase is usually already seeded; if not, use the Import Demo button in the SEK admin screen.
Step 1: Write the config
Section titled “Step 1: Write the config”Create blocks/promo.yaml in the theme. The handle must match the file
basename (promo), and templatePath is a dotted path to the template:
blocks.promo resolves to blocks/promo.php.
label: Promohandle: promotemplatePath: blocks.promocategory: contenticon: layoutdescription: A small promo band with a headline and a short intro paragraph.
fields:  - label: Headline    handle: headline    type: text    description: The promo headline    validation:      - type: required        message: Headline is required
  - label: Intro    handle: intro    type: wysiwyg    description: A short paragraph beneath the headline
Each field has a label (shown in the editor), a handle (the key the saved
value is stored under), and a type (which
field type renders the input). text
and wysiwyg are two of the field types in the free download; the full set is
in the field-types catalogue. Fields may
also carry validation rules and type-specific options: see the
configuration reference.
Step 2: Write the template
Section titled “Step 2: Write the template”Create blocks/promo.php. The template receives two variables from the plugin:
$data: the saved field values, keyed by each field’shandle($data['headline'],$data['intro']). Read them defensively with?? '', because a value may not have been entered yet.$sekAttr: an attribute string the section’s root element must echo. It renders adata-section-idmarker inside the live-preview iframe and an empty string on the real front end, so live output is byte-identical to raw template output. Omit it and live preview cannot target this section.
<?phpif (! defined('ABSPATH')) { exit;}?><section class="promo"<?= $sekAttr ?>> <div class="mx-auto max-w-[72rem] px-8 py-16"> <h2><?= sek_text($data['headline'] ?? '') ?></h2> <div><?= sek_text($data['intro'] ?? '') ?></div> </div></section>The same template in a Sage theme, using Blade’s unescaped {!! !!} because
$sekAttr and sek_text() output are pre-escaped attribute/markup strings:
<section class="promo"{!! $sekAttr !!}> <div class="mx-auto max-w-[72rem] px-8 py-16"> <h2>{!! sek_text($data['headline'] ?? '') !!}</h2> <div>{!! sek_text($data['intro'] ?? '') !!}</div> </div></section>SEK renders Blade templates only when the theme opts in with
add_filter('sek/render_mode', fn () => 'sage'); (usually in
app/filters.php); the default is plain PHP. See
Classic PHP vs Blade.
sek_text() is a plugin-provided global helper, used for text and WYSIWYG
values; the starter kit’s theme also ships sek_image() for image field
values and icon() for icon symbol names. The if (! defined('ABSPATH')) guard
in the PHP form is the standard WordPress direct-access guard (a Blade view is
not directly web-accessible the way a raw .php include is, so the Blade form
omits it). See
Handles & Blade templates for the full
render contract, including how a Sage theme renders the same $data /
$sekAttr pair through a Blade template instead of plain PHP.
Step 3: Register the handle
Section titled “Step 3: Register the handle”A section config on disk is not yet available to any editor: it has to be
listed for a post type. Open the page post-type config and add promo to the
sections: list:
fields: - label: Page Layout handle: page_tabs type: tabs fields: - label: Content handle: content_tab type: tab fields: - label: Page Sections handle: content type: sections sections: - hero # ...existing handles... - callout - promo # ← add your handlemain.yaml is the config the Page editor loads (the file basename maps to
the post-type slug; main is the page fallback). The sections: list is an
allowlist scoped to the active theme: only handles whose
blocks/<handle>.yaml exists resolve. That is why the config in Step 1 comes
first.
Step 4: Add it in the editor
Section titled “Step 4: Add it in the editor”Edit a Page (wp-admin → Pages, or a fresh
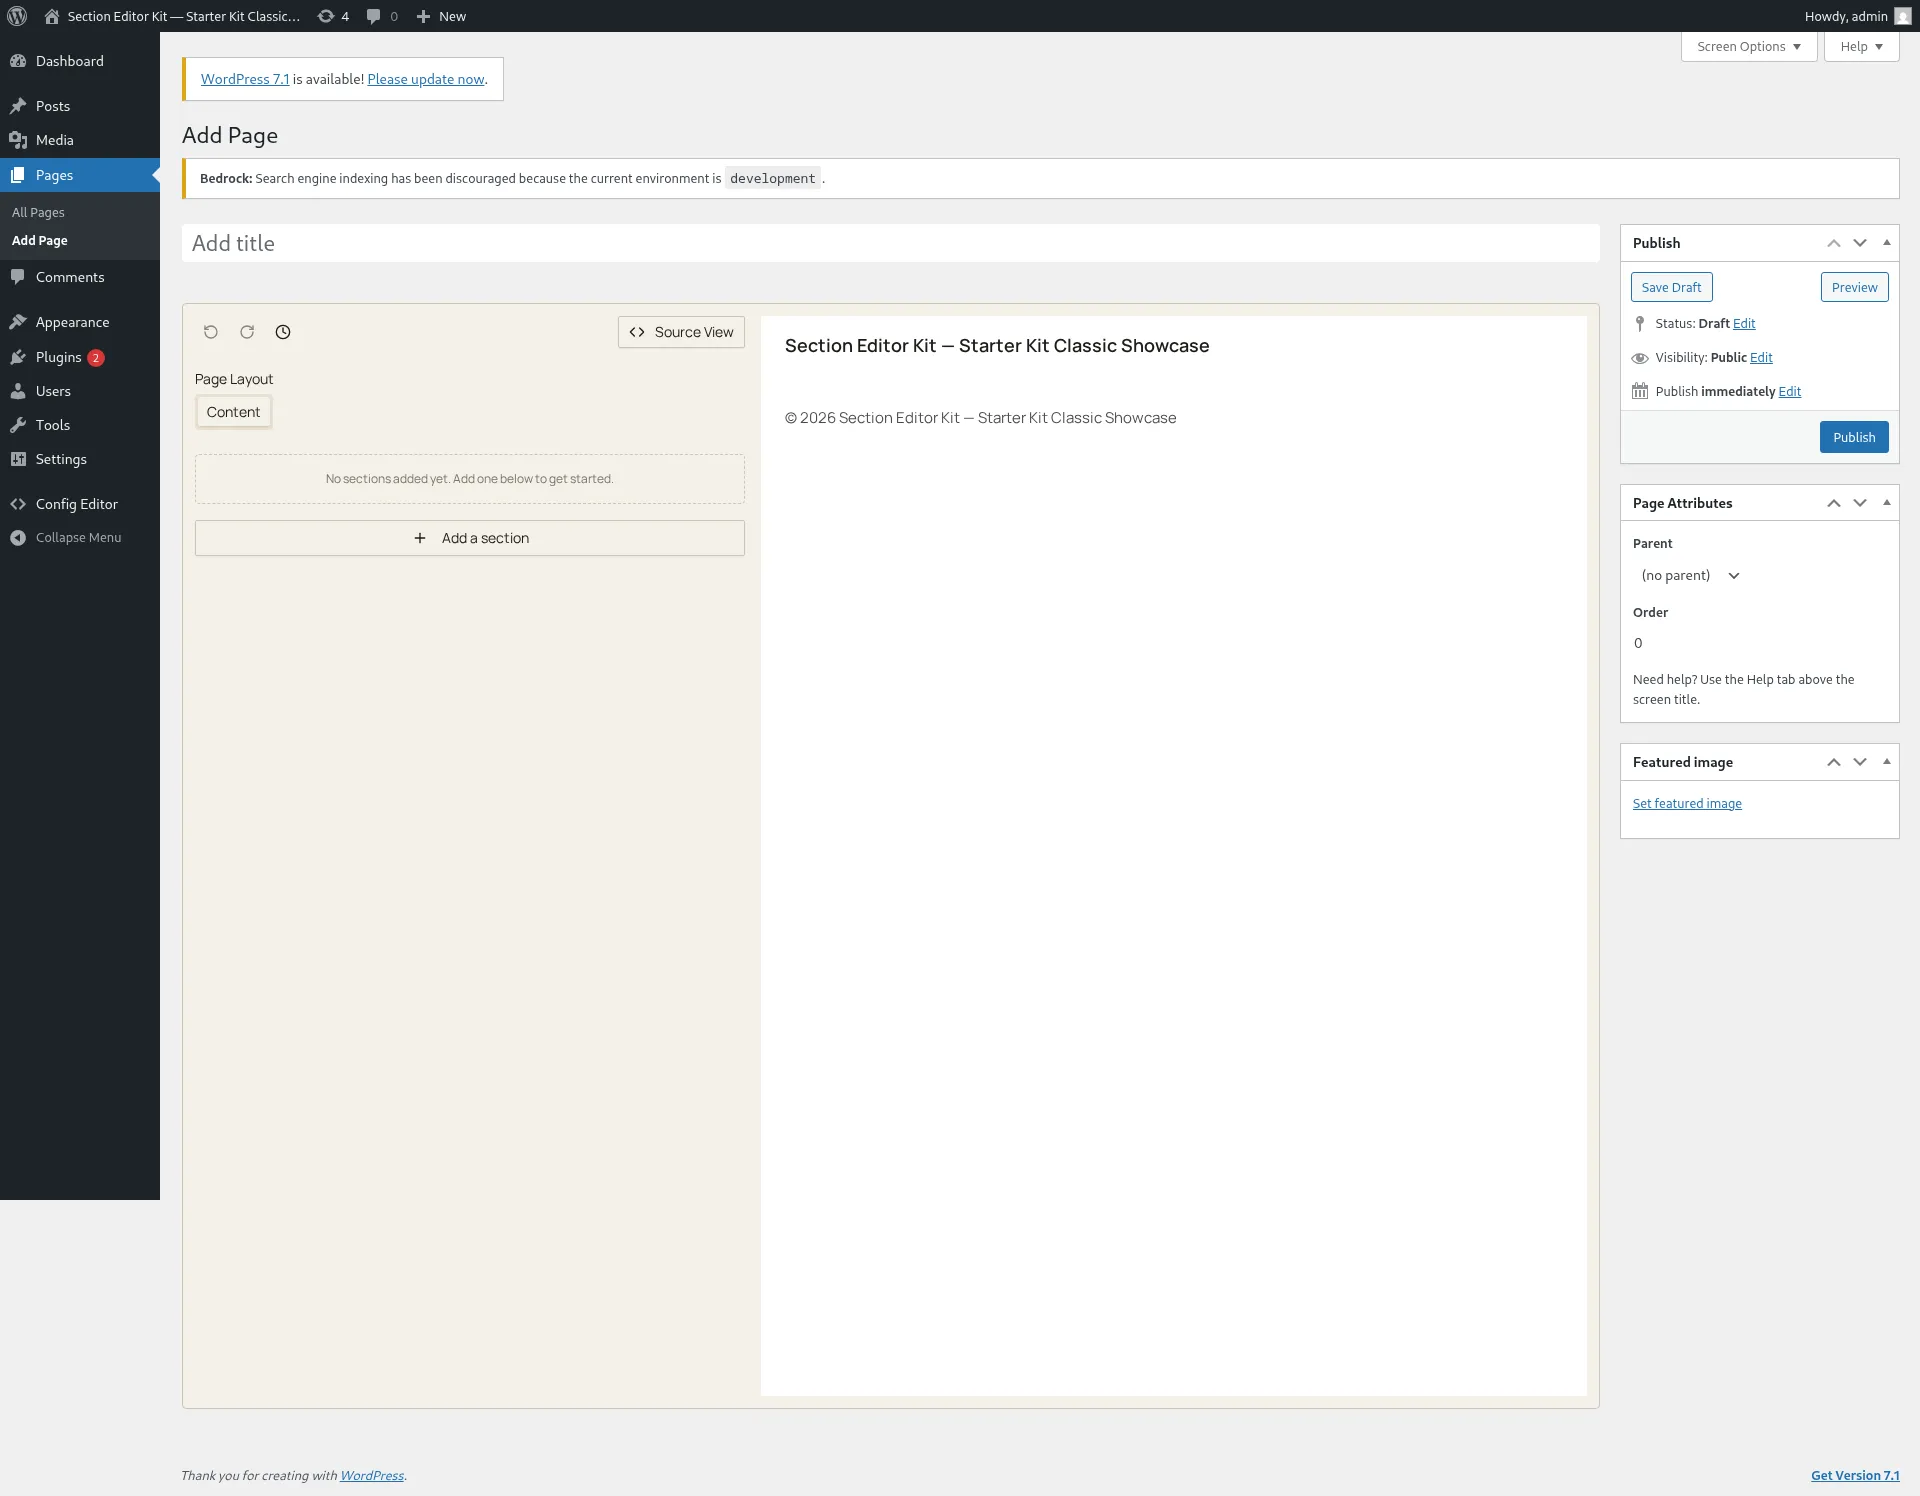
post-new.php?post_type=page). A brand-new page opens the SEK editor in its
empty state (nothing added yet, just the affordance to add a first section):
-
Open the add-section picker.
Promonow appears alongside the starter kit’s own sections.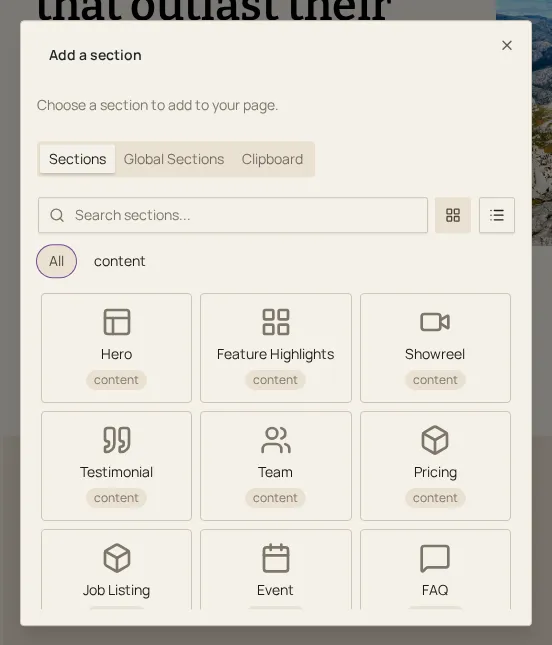
-
Add it. The section’s fields (Headline and Intro) render as inputs.
-
Enter a headline and an intro paragraph.
-
Update the page to save.
The values are stored as JSON in the page’s _sek_data meta: not in a
separate table, and not as HTML. Only the values live in the database; the
structure stays in your promo.yaml. That split is
config as source of truth, SEK’s
central idea.
Step 5: See it render
Section titled “Step 5: See it render”View the page on the front end. The promo section renders through
blocks/promo.php, with your headline and intro in place. Because the template
echoed $sekAttr, the same section is also targetable by
live preview while you edit.
That is a whole section, end to end: config → template → registration → edit → render. Everything else (more field types, nesting, conditional visibility, global sections) builds on this same pair-plus-registration shape.